Last Updated on 2026-06-18 by Daev Roehr
Regarding various aspects of home theater and tips on how to have great sound and video on a budget. And my 45+ yr history with “home theater”.
My home theater (and how I designed it)
In order to design a home theater that fits your lifestyle, you have to define the project requirements up front. This is not only defining your viewing habits, but also your space and family constraints.
Summary
A key take-away is modest equipment properly set in a decent room will blow the doors off of expensive equipment that’s just tossed together in a horrid room. Attention paid to room lighting & acoustics, speaker positioning, matching speakers to room size, clean reliable AC power, good wiring practices, and careful audio and video calibration will pay off handsomely. Especially in my case, where the living room is also the “Home Theater”.
Introduction
I’ve been involved in audio since the mono vacuum tube days, and into home theater before it was even called home theater. My first A/V foray was to run broadcast TV audio through an isolation transformer into my stereo. (It sounded awful: it was full of hum, NTSC video noise, and bandwidth was limited.)
As time went on, A/V quality gradually improved… and I trailed along.
First there was stereo sound on video tape (via linear analog tracks on the tape). I believe the first VHS stereo prerecorded tape was “Elephant Parts“, released on VHS (stereo) and Betamax (mono) in 1981.
I had a then considered large 19″ video monitor and a nice stereo, pretty stylin’ for the day. I even bought a very expensive VHS copy of Star Wars when they came off “rental only” status. This was the late 70s to early 80s, IIRC.
Later, there was stereo generally on VHS-Hi-Fi, stereo MTS broadcasts, etc.
LaserDiscs happened in the early 80s, which offered a huge improvement in both audio and video quality. Finally, decent home video… and acceptable stereo to my hi-fi ears. I immediately invested in an expensive LD player, hooked it all up, and got a few LaserDiscs. Wow! Impressive! And I immediately had to upgrade my screen to a monster sized 26″ Sony CRT (over 120 lbs) to enjoy it.
And I bought Star Wars on LD too, of course.
Then came Dolby Surround w Pro-Logic (all analog at this point), which was my first taste of theater surround in a home environment. I immediately went for it.
Surround Sound, Yay!
Next came digital surround sound, with AC-3 (now called Dolby Digital), and dts in 5.1 surround. Original aspect ratio (i.e. Letter box) became more popular about here as well. (So yes, another copy of Star Wars on LD with Letterboxing… and AC-3 surround sound too.)
As the audio and video standards changed, I doggedly followed along: DVDs and the various enhanced surrounds, THX, more speakers and receivers and oh my!, etc.
(Yes, more copies of Star Wars…)
But all these years of will-nilly changes and upgrades were encrusted onto and hacked into my system. I had a mismatched speaker set, an awkward to use amp & video switching system… a real hodge-podge of equipment strung together. It was time for a rethink and a carefully designed upgrade. Plus there was this Hi-Def thing about to happen.
So, stepping back a bit…
My viewing and listening habits
I almost never watch anything in the daytime, and I haven’t watched “broadcast” TV for several decades.
I mostly watch physical media, although as of 2024 streaming is creeping into the mix.
I tend to listen at lower than reference sound levels to avoid provoking my tinnitus.
Content is mostly Feature Movies, Concerts, Nature & BBC type series, and Anime.
I like to see the “behind the scenes” and the “making of” segments.
I didn’t watch streaming services for a long time, as the commercial interruptions, annoying Ux’s, and technical deficiencies of streaming and OTA broadcasting really annoy me.
For example:
– I hate commercials
– The Streaming user interface design is deplorable and often assumes incorrectly what I want to do
– The streaming video often stutters or has video codec or transmission artifacts, the audio typically is down-mixed and bit depth reduced i.e. lower fidelity and less channels
Since I’m into high quality sound and video, these are big negatives for me.
(UPDATE: As of 2022 November, I am starting to watch some streaming content. My home now has a gigabit fibre internet connection, and Dolby HD and even occasionally Atmos 4K content is now being streamed. It looks and sounds acceptable most of the time now.)
Audio wise, I have several hundred audio discs (CD’s, SACD’s, DVD-A, and some dts and AC-3 as well). Some are high bit rate 2 channel, some are multi channel PCM, some have even been encoded via a surround codec for surround presentation. For example, I have most of the classic “RCA Living Stereo” recordings on SACD, many in a three channel format as they were recorded. *These are well recorded and feature top musicians and conductors of the day, worth checking out.*
So the home theater audio system sometimes does “double duty” for these multi-channel hi-fi audio discs. That also means I don’t like dipole surrounds as I prefer to match the side channels to the front channel speakers for these formats.
Finally, I have a large LP collection (vinyl in today’s new-speak) and even some 78’s I still listen to. These are played on a separate vintage stereo system and aren’t part of the home theater equation here. (Go Old School!)
To sum up, I like a big picture and effortless clean sound with solid bass, which means a big screen and a full surround sound setup with multiple sub-woofer(s) are key ingredients. Since the sound doesn’t have to be heard in the next county, my criteria is how it sounds at lower volumes, typically less than 85 dB.
The theater space
We own a modest cozy home in a coastal town on a large-ish lot with driveways between us and the neighbors… meaning home theater bass is less likely to disturb them. The living room looked to be the best home theater space… except I wanted it to also be a “people” living space, where we entertain guests, watch the fireplace, and chat with friends. Also, I intensely dislike big black voids (i.e. big flat panel TV) as they suck up the “feel” of a space. An alternative large screen technology will be needed.
Seating for six people, ambient lighting, and a floor to ceiling, wall to wall bookcase on one wall and a large picture window on another completes the room description and needs.
These requirements suggested a pull-down projection screen with a ceiling mount projector, smallish speakers, and hiding a lot of the equipment in a nearby closet. Aside from the space issue, not having the equipment in the room removes visual distractions and keeps dust and fur from invading it. (It also means a fairly elaborate IR repeater system is needed for the various IR remotes to work.)
Fortunately I have a tolerant wife who shares my A/V enthusiasms, so no issues from the family… aside from budget and aesthetics in the room.
Room treatment
Before doing all the whiz bang electronics stuff, get your room up to par visually and acoustically.
Acoustics
The typical household room is usually poorly suited for high quality audio/video presentations. It is often acoustically bright and harsh sounding with too much echo, the ambient noise level is usually too high, and it will be full of rattles when the subs kick in. Doors and windows will be where you want to place speakers, and a fireplace will be where the screen should go. And so forth.
In my case, the room has a standard 8 foot ceiling, a hardwood floor, a picture window, 2 doorways, and a fireplace. All these needed to be considered for treatment.
A few sound basics
Hard parallel surfaces are bad, they bounce the sound back and forth and make mush out of everything. (This is why some many trendy restaurants are impossibly loud and difficult to have a conversation in.)
Fortunately, only one of the two parallel surface needs to treated to avoid the bounce, and also fortunately carpets, heavy fabrics, and soft fluffy couches are inexpensive and good sound absorbers.
Ambient noise is another tough one, you want the room to be as quiet as possible. That can be difficult in a city, with neighbors, traffic, barking dogs, and other acoustic assaults. Windows are a prime way sound will get into a room, double pane glass and more heavy curtains will help.
In my case, the ceiling/floor issue was easily resolved with a large area rug on the floor, the window got a set of opaque mist curtains & blackout drapes to block acoustic reflections from the glass and quiet city and street noise. Media storage (books, CD’s and DVD/blu-ray/UHD) provided acceptable diffusion on the two other walls.
Video/Visuals
Next, consider the visuals and lighting. Projectors works best in a dark room so windows and doorways are not friends, especially in daytime. Here, blackout curtains do “double duty” as both sound control and light reduction from the window.
One doorway happily already had a pocket door; the other bedroom door can be closed, and putting the room lights on a dimmer took care of the last bit of lighting treatments. The pull down screen blocks the visual clutter of the fireplace and mantel, and the darkened room diminishes the impact of the room’s knick-knacks.
Equipment and Placement
Speakers get placed around the room, equipment goes on a rack in the wiring closet, wiring goes everywhere… Ha-Ha!
Oops, what about evolution and upgrades? To illustrate, here’s the history of my A/V systems…
Gen Zero: Old School – 27″ CRT w S-Video, first gen Dolby Surround & Dolby Digital – Early 80s
I had a 27″ Sony CRT monitor built into the wall with a S-video connection back to a video switch & Y/C separator.
An early Marantz outboard AC-3 decoder (now called Dolby Digital) handled the surround decoding chores. The sources were a VHS-S Hi-Fi tape deck, a Pioneer Elite CLD-59 LaserDisc player(still in service as of 2024) , and gradually various Pioneer and Sony DVD-players as DVD’s started to enter the market.
Gen One: Projection w S-Video, DD and dts – appx 2000
The Gen One system was still mostly analog. The video connections were S-Video, with composite as a fallback. This first system had a series of 4:3 NTSC projectors and screens, ending up with a Plus U3, a DLP based computer projector @1024×768 res. The receiver (a Pioneer IIRC) had S-video switching.
Audio was a 5.1 surround setup with AC-3/Dolby Digital, dts, and Dolby ProLogic for older material. Most audio was sent over S/P-DIF digital cabling, and I was using Infinity speakers, great sound for the money.
Gen Two: Going Digital and 16×9 – appx 2007
The Gen Two system was an upgrade for both widescreen and HDMI (now the default digital A/V connection). The projection system got a big upgrade to a hidef (1080P) 16×9 Panasonic PT AE200U projector and 120″ 16×9 screen in preparation for the eventual move to hi-def sources. The receiver is now a Pioneer 7.1 unit with a couple of HDMI A/V connections, and a region free DVD player with an HDMI output.
More speakers called for a speaker upgrade, the old ones were getting dated. I went from the Infinity’s to the Andrew Jones designed Pioneer’s SP-BS22-LR series, an excellent value for good sound.
This generation was the first foray into using a Harmony unified remote control to sequence everything, a decided improvement. (It was still in use as of 2025, until Logitech EOL’d it mid year.)
Gen Three: Hi-Def sources
The third gen upgraded the rest of the electronics to 2K (or 1080p) hi-def: A blu-ray player, a 1080i broadcast tuner (last used for the Chinese 2008 Olympic games, I believe), and receiver (an Onkyo TX SR-806) that could handle up to 1080P signals on HDMI. The new disc player loads faster and plays DVD-A and SACD in surround and bitstreams the audio over HDMI to my receivers PCM and DSD decoders, another win. As a bonus, the Onkyo receiver has a pretty good upscaler for my older VHS, Laserdiscs, and std def DVDs.
Gen Four: Dolby Atmos and 4K sources – appx 2015
I was planning on replacing my older receiver with a current one with plenty of inputs (both old style analog video and HDMI), when Dolby Atmos was released. I decided to hold off a while to see whether it was going to take off or not. Meanwhile, I continued with the Onkyo receiver with my Pioneer speakers and a Sunfire subwoofer with the Panasonic PT AE200U projection system.
Two years later, it was time. Atmos (and dts-X) is now the defacto “best sound”, and in the meanwhile, 4K UHD blu-rays were starting to trickle out. I still have that nice Panasonic projector & 16×9 screen that I don’t feel a need to replace yet, but the promise of Atmos was intriguing. However, a full home Atmos system is a 7.2.4 (7 mains, 2 subs, 4 ceiling). 11 channels is a lot of amps in a small box, not a good idea. Also, that’s a lot of new speakers and ugly wiring, and long speaker wiring loses power rapidly. Hmmm.
Around 2015, Pioneer released up firing Atmos speakers add-ons for my existing Pioneer (Andrew Jones design) speaker system and Onkyo released the PRSC5530 AV “controller” front end “preamp”; ie no internal amps, just balanced line outputs.
This was exactly what I wanted.
For the speakers, I don’t have to cut holes in the ceiling(!) and the speaker system maintains it’s “matched” characteristics.
For the electronics, the Onkyo pre-pro has balanced audio outs, which allows the use of much more reliable pro balanced cabling and associated locking XLR connectors. Combined with Atmos, all the various other surround and upmix modes, plenty of I/O and Spotify music streaming support, this was (and is) an excellent performer.
One the many interesting feature of Atmos is the use of two subwoofers, a left and a right feed. It’s been long known that properly placing a pair of subs will smooth out the inevitable room bass response irregularities, and that if you play the same signal through them they will be a not-insignificant 6 dB louder than a single speaker, ie your “boom-bang-crashes” can be louder with less strain. And although low bass is fairly non-directional, one sub still tends to muddy the spatial location sound cues a bit. A pair of subs located along the front line speakers is a big improvement in many ways. I use two pair of tiny Energy ESW-M6 subs stacked, they fit my smallish room nicely and provide a decent sub experience.
Next, I acquired a bunch (seven plus a few spares) of pro audio Crown D75 rack mount amps for my amplifier stack. Crown D75 amp review.
These units from the late 70’s / early 80’s are good quality “old school” analog amps designed for recording studio in-room use. They are rugged, dependable, compact(1U), very quiet both electrically and acoustically (no fan), decent sounding, have balanced inputs, and can be easily run in true bridged mode with a flick of a switch. In bridged mode, these easily crank out a solid and clean 90 watts or so.
My amp plan for the five front channels uses 3 Crown amps in bridged mode for the 3 main speakers (L/C/R), 1 Crown amp in 2 channel mode for the front verticals. All the amps are located in the front of the room near the speakers. Note the subs are self powered.
For the six back/side speakers, I used another 3 Crown amps in 2 channel mode for the surround and vertical speakers; these amps are in the utility closet rack with the Onkyo pre-amp and media players.
Power management
I pulled a dedicated 20 amp circuit from the breaker box to my wiring closet first thing, then considered the requirements.
With this many amps (seven stereo amp chassis, three subs) you must power sequence them to avoid blowing your AC power circuit breakers. Plus, it’s very user unfriendly (and error prone) to have to manually turn all the amps on and off in a special sequence.
A pair of Furman remote power sequencer and AC filter system (driven from the 12VDC preamp control signal) was engaged to handle these power chores for the two amp equipment racks. The Furman sequencers plug into the dedicated circuit, and elegantly power up and down all the bits.
Also of note, a heavy duty rack mount UPS provides safety against power flickers and brief outages for the projector, preamp, and sources units.
Cabling
For the audio, eight channels of pro balanced cabling in a “stage snake” was pulled from the wiring closet through the attic to the front of the room to drive the seven channels (five amps and two sub-woofers, Left and Right), plus the all important spare channel should a wire go defective. XLR connections pretty much eliminate the inevitable “bad connection” issues with consumer grade cinch/RCA connections, and balanced wiring is inherently immune to hum and noise pickup on longer runs, like here.
I spent several days wiring everything up and testing it, fixing the usual annoying issues along the way. For example, the cheapy IR repeater system proved to be flaky, so I replaced it with a higher quality one.
And then I ran into myriad and many weird HDMI issues with getting Atmos to work.
Among other things, it turns out a lot of the newer “blockbuster” movies with an Atmos soundtrack… only put the Atmos soundtrack on the 4K UHD releases, not the 2K blu-ray. Bah! Argh!
And if the projector’s audio capabilities isn’t the same as the receivers, that has to be accounted for via audio stripping.
And due to the always annoying HDPC issues, trying to use a HDMI splitter with a lower res control room monitor fouled up resolution, audio codec detection, and HDR decoding to the point of un-usability. (Finally found one that works, but I have about 8 less than useful splitters laying around now.)
Lastly was the usual speaker and monitor calibration, input labeling, and programming of the unified remote control.
Results to date: Here’s a shot of my living room in home theater mode. The bit of dim room lighting is for the photo, not my usual darkened viewing environment. (Cat included for size reference.)
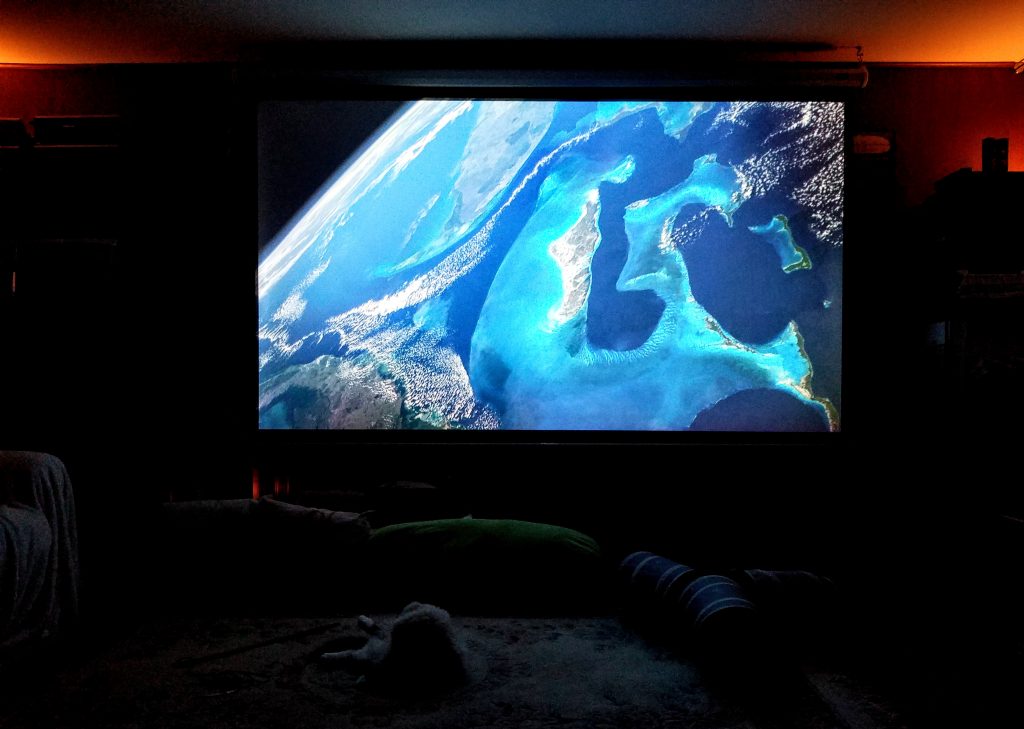
The 120″ pull down screen is about 12 feet away from my usual recliner. That works out to about a 40 degree viewing angle, a bit better than the 36 degrees min. THX standards call for. Coupled with the 7.2.4 Dolby Atmos audio system, it makes for a very immersive movie experience.
And bliss ensues for several years, until…
Gen Five: 4K projector – 2020.01.16
Planned for 2020: Updating my trusty but aging 13 yr old Panasonic AE2000 projector with a new 4K HDR one, probably the Optoma UHD60. This should be a significant upgrade in resolution, brightness, contrast, and color fidelity.
Hopefully.
The new projector is indeed a significant improvement in resolution, overall brightness, black level, and color fidelity and brilliance. Yay! The dark detail is much better, without the usual purple cast. Rainbows are not readily apparent (to me, anyways) and much better than the last DLP I had some 15 years ago.
– The Blu-ray of “Howl’s Moving Castle” is vivid and practically leaps off the screen, and “Miss Fisher’s Murder Mysteries” has subtle and rich details in the many dark scenes.
– Even my ancient LaserDisc collection looks pretty good after some playing around with de-noising and sharpness options.
And now, the downsides…
1) Pixelization “boiling” Issue
There was a significant amount of very annoying white pixelization boiling in SDR mode until I cranked down the “Brilliance” control to 2. The resulting dull and washed out picture then require considerable black and white level adjustment to look good again.
I used a grey scale test pattern and some source viewing to re-calibrate, a full instrument recal is in the works now.
2) Focus and brightness uneven
The focus at the edges is a little fuzzy and brightness linearity across the screen in merely OK, with falloff at the the corners. Clearly visible with test patterns, but not real noticeable during viewing. Probably a design trade-off caused by some cost cutting in the optics.
3) HDMI vs 4k vs HDR vs Atmos vs… everything – (HDMI system issue, not a projector problem). Again with the HDMI hassles!
HDMI is a flaky and temperamental standard at best, and hair-pullingly annoying always. It turned out my Onkyo 4K compatible pre-amp actually doesn’t pass thru some of the newer HDR handshakes, nor did my first 4K disc player produce them. I replaced the player, but the HDR feature only works with a direct player connection to the projector, which means the preamps config and status screens aren’t visible. My first and second attempts at using HDMI splitters failed with no HDR, sound dropout issues, or a failure to recognize the Dolby Atmos soundtracks. Again.
Grrr.
For now, I just have two players. One is the 4k HDR10 “theatrical” player, the other is my older Oppo everything player (Blu-Ray, std def DVD, DVD-Audio, SACD, CD).
Gen Six – Audio Upgrade – 2022.10.05
Big changes in the works. I’m replacing much of the audio chain.
– Swapping the Onkyo pre-pro with a Emotiva XMC-2 pre-pro, which cleans up my 4K HDMI support, adds DTS-X audio, and has a Dirac filter audio correction system.
– Changing the most critical front LCR front amps and speakers from the Crown/Pioneer combos to three tiny but mighty Genelec 8010A’s. Reasons:
— They sound awesome at the moderate volumes I listen at.
— They reduce the number of external amps in the rack by three and eliminate two towers of speakers and a bunch of wiring in my media den, er, living room.
-The next most critical speakers (side) were exchanged for smaller passive Audio Engine P4’s I had laying around.
– The non critical rear speakers will be be swapped for vintage Minimus 7’s.
– For now, I will keep using the four Pioneer up-firing Atmos “pancake” height speakers.
– For the subwoofers, the L/R Subwoofers are two pair of Energy ESW-M6 for L/R, and the LFE sub is a rare pro version of the Carver Sunfire True Subwoofer.
These are all small but mighty subs and work well in my smallish room.
This is all in pursuit of:
– Downsizing the physical space a full 7.2+.4 Atmos speaker system consumes in our living room theater.
– Normalizing the system baseline video support to a consistent HDMI 4K/60 HDCP 2.2 state.
– Simplifying the control and switching of the various A/V sources; everything is 4K HDR capable!
I am also upgrading the optical disc player set to:
– A Sony UBP-X800M2 4K which plays almost everything in my library (eg 4K UHD, blu-ray 2K, DVD, SACD, DVD-A, CD, etc.). In fact, it plays everything that’s a 12 cm shiny disc except non-US region 1 video discs and some R/W one off variants.
– A Panasonic DP-UB420 (plays 4K UHD and region free blu-ray (but not region free DVDs, oddly enough). (I use this to reduce wear on the Sony, and to play all regions of blu-ray.)
– And my ancient but trusty region free Pioneer DV-490V, plays all DVD regions and video standards ( i.e. PAL NA NTSC).
– Streaming –
I’m grudgingly adding an Amazon 4K firestick for streaming services, Spotify audio support, and ‘casting. I chose this option because the firestick has a dongle RJ-45 ethernet option. Streaming over wireless is too flaky for my taste.
UPDATE 2024: The Amazon Firestick has a most annoying bug that *LOOKS* like a bandwidth problem, where the picture breaks up into pixelated blocks after a week or so of operation. *HOWEVER* It is *not* a bandwidth problem! I have a gigabit fiber connection and the iPad I now use does not have this problem. Also, the problem clears up after a reboot. (Argh!)
So… as of 2024, I’m using an iPad for my streaming, and this gets around the annoying firestick uX. When hardwired via the USB C connection to power, HDMI, and a USB to ethernet adaptor, it’s a pretty reliable performer. The iPad apps are way better and more reliable than the rather awful firestick ones, and searching and typing is way easier too.
– I do not own a “TV”, but I have an old HDTV “over the air” tuner.
I think I last used this to watch the Chinese Olympic games opener in 2008, wonder if it still works?
My analog legacy video sources are my NTSCV (analog) LaserDisc and a VHS tape player, fed into a composite to HDMI scaler/converter. The LD player has the RF out jack (and I have the converter), so AC-3 (now called Dolby Digital) and dts sound can be extracted too.
For legacy analog anly audio sources, like LP’s, AM/FM radio, and CD/SACD’s, I have a separate stereo only audio system. It’s an eclectic mix of vintage and modern stuff: An Emotiva BASX-PT2 preamp out to Klipsch Heresy speakers. Amps are Dynaco Mark IV and Scott tube amps with a vintage Hafler MOSFET as backup.
A Scott tube preamp and AM/FM tuner, along with a Technics 1210 turntable and a Denon SACD player round out this system.
Minor tweaks and tuning until late 2025, until…
Gen Seven – Upgrades! – 2026
Video:
2026.01.17 – Current projector (Optoma UHD60) is starting to flicker, in that way that says the bulb is about to go. It’s been six years in service, time to upgrade!
Room 8 foot ceiling, appx 12′ throw to screen
Screen 120″ diag or 105″x58″ (16×9). From the lowest part of the screen to the the fireplace hearth is about 13″, and it’s about 24 inches to the floor.
Projector: candidate: BenQ W4100i 4K DLP Projector, 3200 lumens
Ordered it, should be here in a couple of days.
It arrived, and for the first time ever my ceiling mounting spot was too close for my 120″ screen; the picture was too large at min zoom! Grrr!
Fortunately, the excellent universal bracket I installed about 20 years ago allowed me to slide the projector far enough forward to fit the image onto the screen, but it was real close.
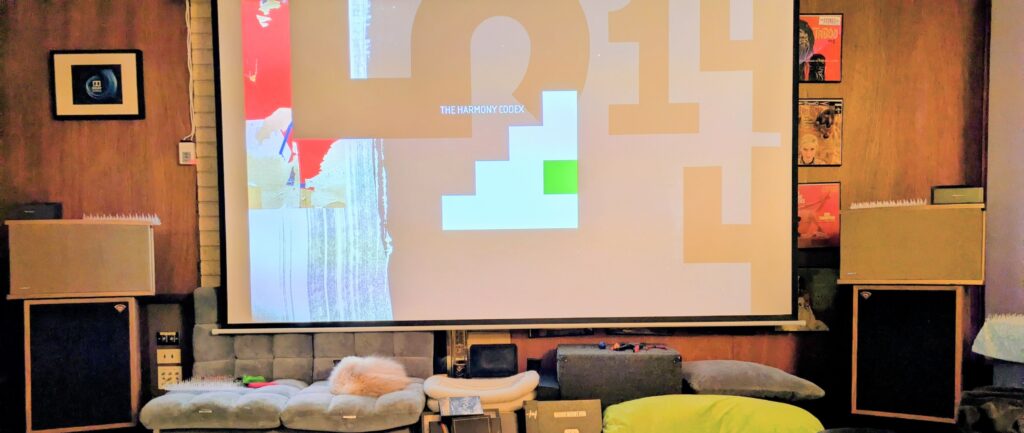
Photo taken with room lights on
A quick setup pass and wow! this projector is quite a step up from the prior Optoma. Much better focus and linearity, and brighter colors and better contrast as well.
So far, my only complaints are the mis-specified throw distance, and the annoyance that the 12volt trigger is output only. No input trigger messes up my wired power on sequencing, still debating how I’m going to handle that. Probably do an arduino hack if the IR control proves unreliable.
UPDATE 1: Turns out this projector supports Blu-ray 3D via DLP-Link, so I ordered some active glasses to play with it. The last I tried this (a decade or so ago) the picture was too dim, but maybe now…
UPDATE 2: The first 3D try proved disappointing, until I realized the HDMI splitter I was using wasn’t 3D compatible (or didn’t strip the EDD bits). Once I got 3D to the projection screen, still disappointing! …until I figured out the glasses were out of L/R sync.
Basically, look at the blu-ray startup menu (or the first few frames of the movie) and press the L/R swap button; the difference is obvious!
Audio:
2026.01.28: I’m experimenting with using a pair of Bose 901’s as my Left/Right speakers for better A/V stereo “fill and spread”, and a Bose 101 as the center speaker. (The earlier 101 sounds like a better match for the 901’s then the later 102 and likely presents a similar voicing.) The 901 Fronts and 101 center are now driven by a pro amp, a Rane MA 6S “Six Pac” in bridged mode. It puts out about 300 “real analog” watts per channel. Plenty of headroom, say I!
Since the Emotiva XMC-2 pre-pro has a Dirac room correction system, I should be able to get a nice front sound field and a good clear point source dialog channel. A few weeks of movies and Atmos music listening should inform if this is a good idea or not, but early returns are promising. UPDATE: So far, this is working out well. I had to damp the reflections from the fireplace hearth to improve the center channel clarity. I used a yoga block for elevation off the hearth, and a cat bed pad for the hearth surface in front of the speaker. (I have observed another place to snooze makes the cat happier too.)
A quick bit of level matching, and it was time to run the Dirac system. I was concerned the 901’s reflection based design would confuse the software but it ran without complaints and gave a nice room compensation on the first try.
For listening, first up was Steve Wilsons excellent sounding “Harmony Codex” Atmos mix. Exceeds expectations on all auditory fronts. ![]() Next was a 4k Bluray, “Hans Zimmer Live in Prague”, and yes, it sounds awesome too! So far, Bose 901’s as Front Left/Right and a Bose 101 as the Front Center speaker is a keeper setup.
Next was a 4k Bluray, “Hans Zimmer Live in Prague”, and yes, it sounds awesome too! So far, Bose 901’s as Front Left/Right and a Bose 101 as the Front Center speaker is a keeper setup.
UPDATE: 2026.05.30
Next set of tweaks:
1) After a few weeks, I’m replacing the “too forward and bright” Bose 101 with my previous Pioneer center channel speaker. It’s a better fit for the room, and doesn’t have the rising high end tuning of the “outdoors intended” 101 speaker, which makes it a bit shrill in my room. The 101 was a good idea, but no.
2) My trusty but aging Sunfire True Subwoofer Sunfire pro Sub needs some servicing, and it will likely take me a while to chase the hum issue down. In the meanwhile, I have replaced it with a SVS 3000 Micro R | Evolution, which works great in my smaller living room as the LFE channel for the home theater and the sub for my two channel rig. Like everything these days, it has an app 🙂 , quite handy for adjusting the sub from your listening spot. The in sub parametric EQ let me easily smooth out the in room response and tweak the low end up a bit, all made easier with REW and a UMIK-2.
3) Finally, I’m trading in my old XMC-2 for a shiny new XMC-2+, before the trade-in program disappears. The XMC-2 had a fair number of annoyances and issues, but they claim the big ones have been addressed by the new hardware and OS. Since I have the current unit, I’ll give the new one a (last) try.
System control: Upgrading to the “SofaBaton X2”
2026.01.26: As of mid 2025, it seems my ancient but trusty Logitech Harmony unified remote is no longer supported. Not only no support for new hardware support, but the device maintenance setup and programming app is offline as well. That means I can’t update the devices it supports support and I can’t even edit the current setup anymore, either.
Poop.
Ah well, we had a good run. I’ve chosen the SofaBaton X2 as a replacement, awaiting it’s arrival.
2026.01.29: The SofaBaton X2 arrived. The initial setup was a bit clunky and threw some errors, but a retry worked and I got the app, the base, and the controller to all play together finally. Then there were firmware updates, which installed without a hitch.
So now on to adding devices!
My new BenQ W4100i isn’t in the database, no biggie. I wanted to check out the learning process anyway, it’s pretty straightforward. My only mistake was to press the original remote function buttons too long; that gets interpreted as multiple button presses by the SofaBaton. A quick retry edit with a faster button press fixed that.
The phone app is still a bit rough in terms of UX consistency.
In some places, edit is with the item, others it’s a mode you engage at the top of the screen.
Likewise, sometimes next is at the top of the screen, sometimes the bottom.
Also, there isn’t an “activity template overlay” capability, so the controls I use for my pre/pro (vol up/down, mute, info, decoder modes, etc) had to be tediously re-entered on every activity.
Another head scratcher will be how to best support my iPad as my streaming platform.
I ordered a third party BT “ipad compatible” remote, hopefully I can get play and pause to work.
UPDATE: Yes, this works for play and pause. Handy! Chapter/episode skip remains elusive though.
A more serious problem is the default power on sequence is wrong. In order for the finicky HDMI/HDCP handshakes to work properly, you must always start powering up at the *display* end, and then work your way back up the chain. That is, first power on display and let it settle, then pre/pro or receiver, *then* the source, like your streamer or 4K player.
More on the Emotiva XMC-2 Pre-Processor or “Pre-Pro”
2026.05.26 – trading in my old XMC-2 for a XMC-2+.
I hope this go around is less painful than last time. We shall see…
(My notes on the older unit are below the notes on this new one)
(Old Emotiva XMC-2 notes)
This A/V front end unit is an interesting set of contradictions. The hardware quality is quite good, but the manuals, UX, and software reliability could use A LOT OF improvement
Update: Emotiva is actively doing so, cheers.
But it’s been very slow, the years get jeers.
The initial firmware was version 2.5, which had so many weird issues it almost caused me to return the unit. It felt like an early alpha quality, where the rough edges haven’t been buffed out.
As of 2022.10.16 the current code version is 3.1. This code version resolves the critical issues I was having and I’m much more pleased with the unit now. It’s now “mostly usable”… in a flaky hot rod “Millennium Falcon” kind of way.
The major remaining issues for me are:
1) Switching from one source to another occasionally causes a full system mute which requires a power off reboot cycle to recover from.
2) When syncing up to an audio stream, a moderate volume “tick” often comes from some speakers, usually the fronts. As many 4k discs switch from stereo to a surround format every time you go from menus to the feature, this is quite annoying.
3) The setup UI remains more than a trifle eccentric in use and is still painfully sluggish.
4) Going into and out of the setup menus occasionally locks up the unit. Happens most often when tweaking the Dirac settings, but it has also happened when I just tweak speaker levels.
5) Occasional medium volume ticks and pops when switching sources or resolution/video format change as everything sync’s up.
The company assures me that these issues will be corrected in the next FW release, so I’m being patient. For now. As of Sept 2024, one firmware update has been issued, still waiting for the “big fix”.
UPDATE 2025, May: All new “+” units have been announced, along with trade-in/upgrades. Clarity still lacking on firmware only fix…
2026.05.26 – trading in my old XMC-2 for a XMC-2+.
(My notes on the older unit are below the notes on this new one)
The manual is likewise rather disorganized.
I bought my unit in October of 2022, and the 1.0 rev manual hasn’t been updated since 2019! Oops.
-For example, the specifications page fails to mention most of the specs… but some are scattered throughout the text(!?)
-Another odd lack is a setup checklist. There are two chapters called “Operating the XMC-2”, but no setup guide. (The best reference is a separate 2 pager in the Dirac box.)
Le sigh. Fortunately, I’ve had decades of experience setting up A/V gear, so grumbles about the docs aside, I begin…
In the lab:
Based on experience, I always do a pre-flight test and setup in my shop.
That’s where I discovered the power supplies for the Dirac system and the freebie 100Mbit ethernet hub aren’t marked; neither are the power requirements on the two units. A quick email to Emotiva got a quick response, and with the 1 amp supply on the Dirac beagle compute unit and the 500 mA supply on the hub… I begin.
Next, on to speaker settings, This is the first thing you need to do after hooking up some amps/speakers and an HDMI source. The front LCR speakers I’m moving to are Genelec 8010A’ s, which should be set as “small” in the speaker setup. I also plugged in a single subwoofer into the sub left out to test with.
I set the Genelecs to their more sensitive -10 position, which produces about 87 dB SPL(C) at 1 meter with a -10 dBV pink noise signal from my Audio Precision generator. That’s about as loud as I listen to with my tinnitus hearing issue, as it happens.
The cal tone generator in the Emotiva outputs line levels of -46dBV(low), -36dBV(med), and -26dBV(high) to the FL channel, which (on my speakers) yields about 52dB, 62dB, and 72dB (SPL-C @1 meter), respectively.
Another oddity of the Emotiva uX showed up here, where the signal level was way off (very low) until I turned the generator off then on again. (Perhaps a caching problem in the software? UPDATE: Have not seen since the 3.1 FW was installed.)
External pink noise from the AP at -10 dBV yields 74 db SPL on these speakers
[[EDNOTE: error: loss of 12, not 8 dB SPL? Need to run this down perhaps the internal cal signal doesn’t default to volume 0? ]]
Speaking of volume 0….
Curiously, 0 on the volume control is *not* unity gain through the Emotiva processor.
I ran a -10 dBV balanced 440 HZ sine wave signal on the L balanced input, which yields -18 dBV on the FL output, for a loss of 8 dBV. (Speaker trims were at 0, direct mode, preset 2, no Dirac.) Headroom budget for crest factor or filters, perhaps?
As expected from that info, unity gain is at + 8, so the volume control is indeed calibrated in dB steps, a good thing.
THD in this signal path at -10 dBV is about 0.028%, a good enough figure. THD didn’t change with a +4 dBV signal, a typical signal level for this connection. That’s all good.
Although the ‘A’ filter on my AP isn’t working at the moment, the unweighted THD+N S/N looks good at about -90 dB, that’s good too.
Setup in the theater room
Speaker system: Setting Layout & size, Distance, Levels, and Polarity
- Layout & Size
The first thing to do is decide on the speaker layout and sizes and tell the processor about them. This is clear enough, aside from the slightly complex subwoofer configs. The manual does talk about the sub configs in detail, but a one liner on-screen reminder would have been really helpful here. I’m running the “two subs and a separate LFE only sub” config.
Since I’m replacing an existing Atmos pre-pro, I get to avoid the hours of wiring and speaker/amp placement step this time. Yay.
Also critical to a good surround experience is to configure the speaker distances, trim the levels, and verify all the speaker relative polarities are the same. This is where things get confusing.
- The Emotiva Dirac Quick Start guide informs us Dirac processing ignores the speaker distances. But I think you’ll want to set them for the cases where you would turn Dirac processing off or it’s not used, like “Reference Stereo mode” (pure mode) and “Direct Mode” (like reference, but engages bass management).
- The Emotiva Dirac guide says the speaker levels should be set to 0 and there’s a process to tweak levels as part of the Dirac process. It appears these levels are added to the Dirac app levels post filter application. But, that again dismisses the “no Dirac” processing modes. Hmmm.
- Lastly, nowhere is anything mentioned about checking or setting speaker relative polarity. This is a serious oversight, even if Dirac corrects for this too.
Speaker distances:
May be set in English or Metric units. Measure from the center of the front of the speaker to where the bridge of your nose would be in your usual listening position.
Speaker levels: (and SPL calibration level)
Since I have the Dirac mic and laptop all set up, and I also put REW on the laptop, I’ll just use those for the speaker level and polarity checking
(Be sure to calibrate your mic for SPL and load the Dirac mic calibration file into REW too.) In this case, the goal is to obtain the reference SPL(C) level on all your speakers. But what is the reference?
The official Dolby Atmos guidance is (paraphrased):
“The target SPL can range from 79 dB to 82 dB SPL(C) at the your listening position when driven with pink noise at -20dBFS(rms).” (From “DOLBY ATMOS HOME THEATER INSTALLATION GUIDELINES”, page 15) at dolby-atmos/atmos-installation-guidelines-121318_r3.1.pdf
Since Emotiva gives no clues here, I’m interpolating. Balance connections are typically a nominal +4 dbV = “full scale”, which means a -16 dbV signal is 20dBFS down from that and should produce the reference SPL. And it also implies the volume controls 0 point would be the Dolby reference point too.
[[ED NOTE: Except that -8 dB offset needs to factored in somewhere. Or maybe it is analog only? Sigh.]]
Anyhow, back to the Emotiva.
I measured the Emotiva on my AP, (see above). The internal pink noise generator outputs -26dBV on the “high” setting. Since the “high” signal level is 10 dB less than Dolby’s Atmos recommended level, that means 69 to 72 dB SPL(C) would be the recommended SPL target here.
And fortunately, the “high” output drove my Left Front speaker to about 70 dB SPL(C), measured at at my listening position of appx 4 meters from the speaker.
Excellent, theory and the math agree.
Note: Make sure your listening room is *at least* 10 dB quieter with no test signal than with, or you’ll get erroneous test signal SPL results.
Verifying speaker polarity (old term “phase”)
Verifying speaker polarity is easy… if one can move speakers around. Simply place the reference speaker (I use the Front Left) and the test speaker under test, face to face, about an inch apart. Set the processing to mono or stereo all, and play pink noise (or music with good bass) and listen, then reverse the polarity on the test speaker. Observe the sound almost disappears one way and is clear and full the other, the louder fuller sounding way way is correct. Repeat for every speaker.
(pic with sound sample)
But, since it’s usually the case you can’t move the speakers together easily, here’s another way to test by using the REW app and mic.
In the generator panel, output a square wave with a 10 % duty cycle at a low volume, and feed it to your surround processor in mono or all channels stereo mode.
(Or direct to the amp, mind your levels!)
Using any mic (the one that comes with the Dirac system works great), check the Front Left speaker from a foot or so away and look at the speaker sound in REW’s oscilloscope. Here’s what I see; notice the large spike. When I reverse the speaker polarity, notice the spike “flips”. [[EDNOTE: insert pics here]]
The key is to have all the spikes from all the speakers pointing in the same direction; *that’s* the crucial bit.
(Note: Whether “spikes up or spikes down” is an audible phenomena is another hotly debated topic which I won’t go into here. Look up “absolute polarity” if you’re interested in opening this can of worms.)
Now check the center speaker from a foot or so away. If the spike is the other direction from the Front Left, then that means this speakers polarity is incorrect with reference Front Left, (that’s bad) so flip the Center amp to speaker connection and verify.
Proceed around the room analyzing and, if needed, reversing the amp to speaker hookups until all speakers have the same “in room 1 foot” polarity as the reference Front Left.
Ta-da! All speakers are now “in-phase”. Now it’s time to run the Dirac App.
There are plenty of docs and vids online for this, watch and read before trying to run the app. It’s critical to get the mic sensitivity and the speaker volumes matched up and in a certain range, or else the calibration will fail.
And make sure your cat and yourself isn’t in the same room, the test tones can be painfully loud.