Last Updated on 2026-05-19 by Daev Roehr
This page covers the design and prototyping of my new Allen & Heath CQ18t based “mostly-stationary-at-home-occasionally-mobile” PA rig in a gator case.
I used to do a lot of small event sound/PA work, but have mostly retired from that.
I still have a small PA that primarily resides in my home, where I host micro concerts and movie parties. But every once in a while, my rig still needs to go mobile.
Mounting the equipment in road cases means they can be easily moved when needed, and kept free from dust and accidents when not in use.
When I started doing sound, there “warn’t no fancy digital stuff”, it was all analog.
You had to lug around your speakers, amps, mixer(s), effects racks, a long snake with a stage box, and lots of AC and speaker and mic cables, and adaptors, and… Eww.
Over the years things got a bit more streamlined, but it wasn’t until recently I felt the urge to update. The kicker was the introduction of digital mixers with reliable remote control and low latency. After a lot of evaluation, I selected the Allen & Heath CQ18t as the heart of the new system. 24/96 operation, 18 audio channels, 6 aux outs, some basic FX and routing, and a built in touch-screen for operation (and for when when the remote system crashes or gets forgotten.)
(Bonuses: It’s also a really nice PC/iPad audio audio interface, *and* it’s a good multi-track “on-location” recorder.)
A key benefit of a remote control surface based mixer is you can set up the entire PA system close to the stage (greatly reduces the heavy cabling needs), and use the remote control surface to roam the audience… or go on stage to dial in the sound with each musician. This all makes for faster and easier load-in/out, better sound (in theory), and a lot less running back and forth from mixing station to stage.
A case study, or, what to put it all in
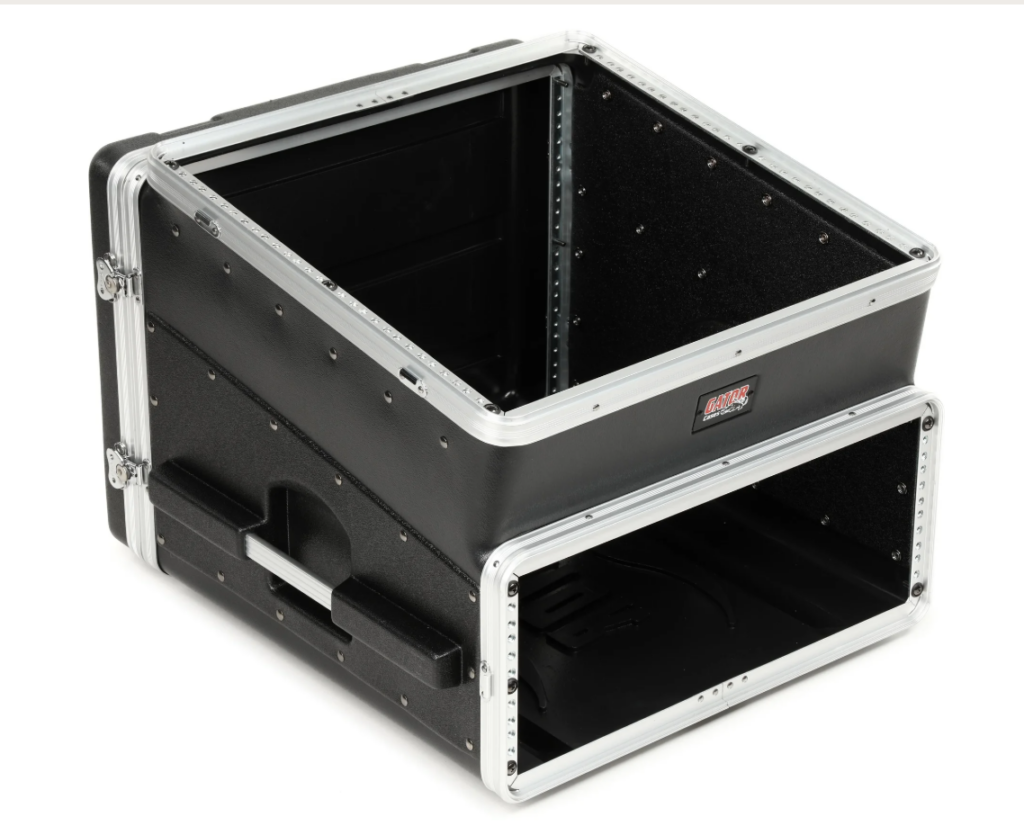
Now that I’ve got a handle (heh) on what I want to do, time to shop around for the case (heh) to use. I don’t do heavy duty or frequent traveling, so the lightweight Gator cases are my usual goto. They make a series of cases for mini mixers, and after some thought I settled on the “Gator GRC-10X4 10U Top / 4U Front Console Audio Rack”.
It has a slanted top rack for the mixer and a 4U front space for other required gizmos.
A nice touch is the back of the case also has rack rails, good for mounting a power distro where it’s most useful.
Looks like a perfect match, in theory, let’s see in practice…
Planning is always key for this sort of thing, but you eventually reach a point where you have to try it out and see if theory matches up to reality.
That means it’s time to prototype!
Prototyping the build
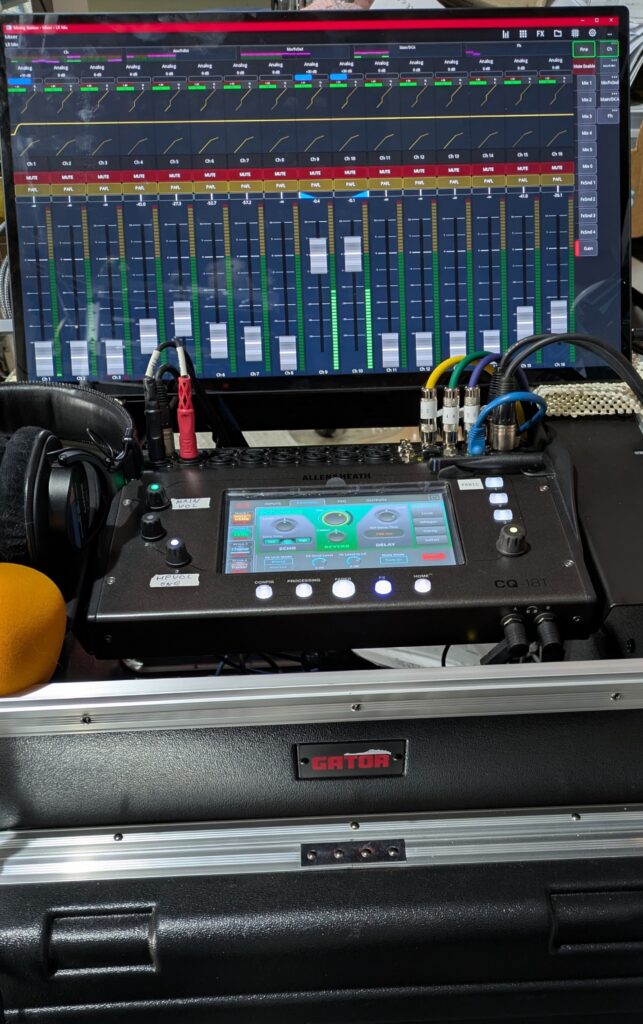
First, attach the mixers rack ears and estimate placement. I immediately saw the headphone jack problem. (This is why we prototype!)
The headphone jack location prevents mounting the mixer at the front of the case. In a rack, that location requires a 2RU space below the control surface to plug/unplug standard 1/4″ headphones. Ugh. I solved this issue by getting a couple of right angle adaptors, which means a more palatable 1U space at the bottom is now sufficient spacing, and as a bonus the space adds a little more air cooling space around the mixer and power amp.
Behind the mixer is a 19″ wide touchscreen with a Win 11 micro PC attached to the monitors VESA mount. This allows a second “view” into the mixers operation, and will usually be displaying the “meter bridge” via mixing station at showtime. Before showtime, it’s used to run the dbx driverack app, and if needed, general PC stuff (web browser, background music player, etc.) The PC/screen combo lifts off the mixing station and fits into a soft carry bag easily.
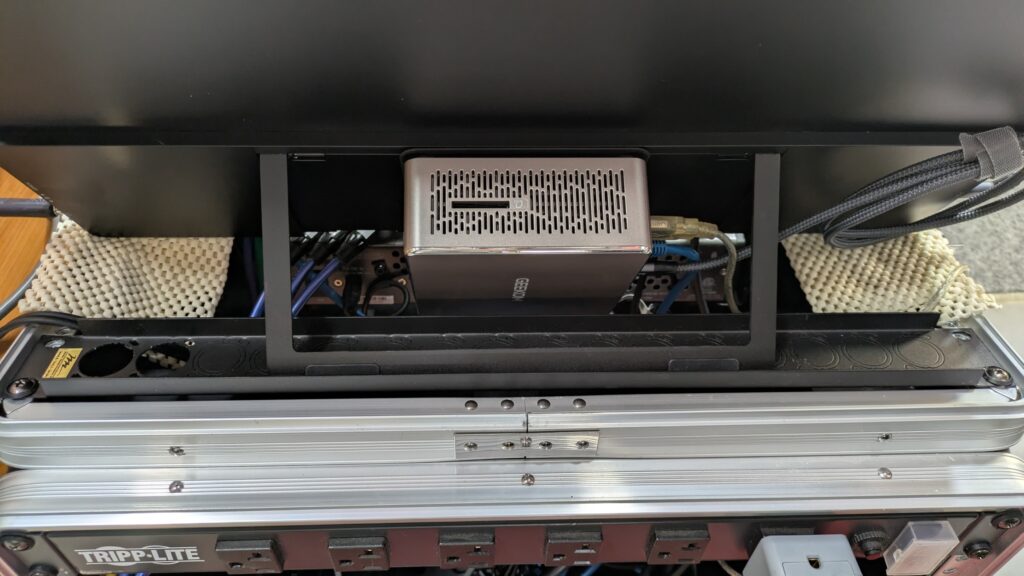
The touchscreen is a “EPORMOT Portable Monitor Touchscreen 21.5 inch”. It uses a single USB C cable for the touchscreen interface, video, and power; I used a right angle C cable to keep the cable profile neat.
The Micro PC is “GEEKOM A5 Mini PC, AMD, 16GB RAM, 512GB SSD, Windows 11 Pro” with a VESA mount. (Windows 11 because the dbx driverack app and a couple other apps I use for audio/video work aren’t on any other common PC platform.)
The touch PC runs a variety of useful tools:
– dbx PA2 software for config setup and room tuning
– REW for room info and speaker analysis
– The control app for the BlackMagic ATEM Mini pro (HDMI video switcher and streamer)
– Dante Controller app
– A&H CQ mixpad and Mixing Station (BTW, Mixing Station has a nice signal level “meter bridge” view! )
A wireless keyboard (in the drawer) with a touchpad finishes off the PC stuff.
I got the Micro PC and Touchscreen on Amazon, and it all set up easily. The most complicated thing was disabling all the sleep, hibernate, and auto power-off options in Windows 11. 🙁
Here’s the current setup, as of 2026.04.26:
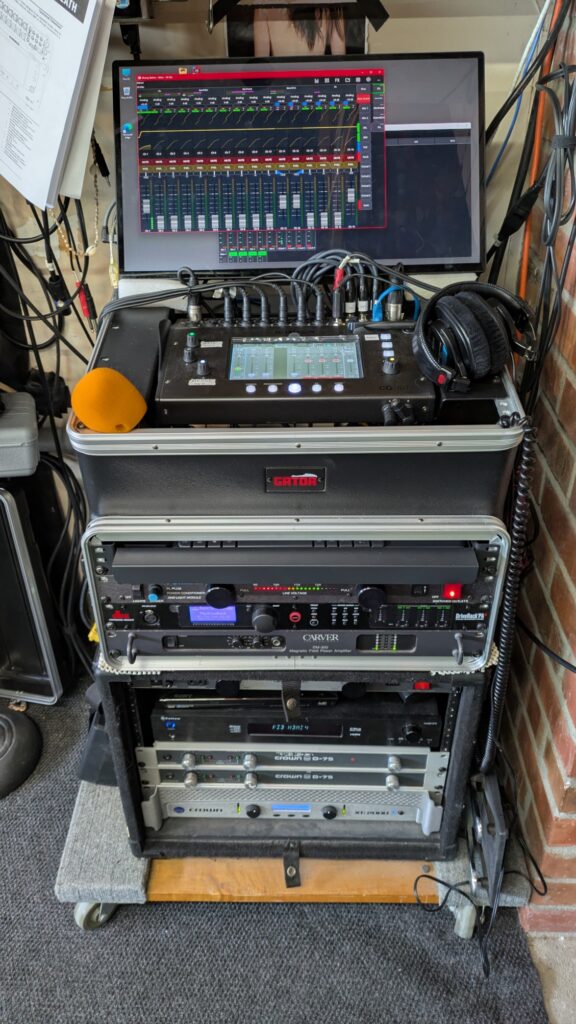
Below the mixer and touch PC space is a rollout keyboard tray, a Furman power conditioner, a dbx driverack PA speaker manager, and a Carver PM 300 1U power amp.
(For bigger gigs that need kilowatts of power, I have a QSC PLX 3102 in a separate case, and the Carver is used as the fill or monitor amp).
The lower case is “stationary” for the home “video” setup.
It has a blu-ray disc player, the decoder and amps for the center and surround speakers, and the subwoofer amp.
An older iPad (off screen) and a second monitor (off screen vertically) completes the control views.
Network connectivity
1) One setup challenge is the networking, as the CQ18t units built in wi-fi doesn’t work for me.
The reasons:
1.A) The driverack PA, the touch PC, and the remote iPad also need network connections; the driverack is hard wired only.
1.B) Even if the above wasn’t an issue, there’s no “location” or “venue” option to configure and save/restore various systems settings, like the wi-fi config. And changing this stuff around is always a PITA, especially when you’re in a hurry during load-in.
1.C) Lastly, wireless is unreliable in high density settings and it always goes flaky at the most critical and inopportune moments. By going wired, I’ll still have the mixers built in Ux and a 2nd view via the touch PC that is immune to wi-fi interference issues and nonsense.
My current plan is the three devices will connect to a gigabit 5 port hub for all the in-box network connections. I’ll then plug in a wired connection at home, or a small hotspot module for the on-location use. No mixer or PC reconfiguration needed.
Audio Cabling and connections
All the audio connections are XLR… except for the awkward use of 1/4″ TRS connections for the six mix outputs. 🙁 (Probably a space issue, as even the 1/4″ jacks are rather close together.) But why is this an issue?
For me, I have standardized on XLR cabling for all line and mic signals; other connector type cables add transport weight and are another point of failure. I resolved this mixer issue by some short TRS to XLR chassis adaptor cables mounted in a 1U plate, like this:
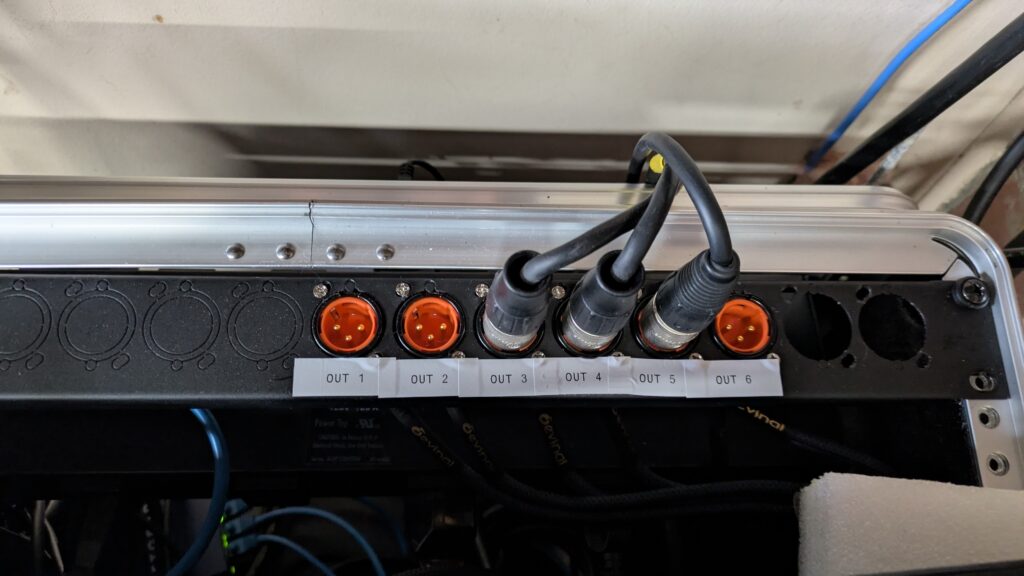
The panel is pre-punched, and the cables were pre-assembled.
Boom, problem solved. (I left 2 spaces for the amp output speakons, just in case.)
UPDATE #1: Predicting the flow of disasters…
– I programmed a “panic” button (mutes all outputs), and knob 1 as a master DCA “volume” control for the six main output(s) I use. These are problem solver shortcuts, very handy when things go sideways.
– I dug out an old synth keyboard dual foot pedal; it works great with this mixers foot pedal input. Programmed one pedal to mute the first 8 channels, typically what I use for mics. The other pedal mutes all the FX(like reverb), great for those “in between song” chats.
(more to come)